
| 일 | 월 | 화 | 수 | 목 | 금 | 토 |
|---|---|---|---|---|---|---|
| 1 | 2 | 3 | 4 | 5 | 6 | 7 |
| 8 | 9 | 10 | 11 | 12 | 13 | 14 |
| 15 | 16 | 17 | 18 | 19 | 20 | 21 |
| 22 | 23 | 24 | 25 | 26 | 27 | 28 |
| 29 | 30 |
- 파이썬공부
- 업다운게임코드
- 운영체제종류
- 바텀네비게이션
- 파이썬배열예제
- int크기
- 정처기
- 안드로이드
- 자바예제
- 파이썬예제
- 컴퓨터일반
- 스누핑
- 정처산기
- 코딩공부
- 자바연산자
- 파이썬배열
- 백준
- 파이썬리스트
- 자바
- 엑티비티
- java
- 데이터베이스
- 파이썬
- bottomnavigation
- 안드로이드스튜디오
- 운영체제목적
- 정보처리산업기사
- 정처기운영체제
- androidstudio
- 코딩
- Today
- Total
발전을 위한 기록
<안드로이드스튜디오> 하단 메뉴 만들기, 화면전환 본문
<안드로이드 스튜디오>
chip-navigtion-bar를 사용하여 하단 메뉴를 만들었습니다.
결과는 글의 마지막 영상으로 확인하실 수 있습니다!
https://github.com/ismaeldivita/chip-navigation-bar
GitHub - ismaeldivita/chip-navigation-bar: An android navigation bar widget
An android navigation bar widget. Contribute to ismaeldivita/chip-navigation-bar development by creating an account on GitHub.
github.com
https://github.com/riwltnchgo0625/JavaChipNavigationBar_test
GitHub - riwltnchgo0625/JavaChipNavigationBar_test
Contribute to riwltnchgo0625/JavaChipNavigationBar_test development by creating an account on GitHub.
github.com
1. build.gradle에 implementation추가하기
chip-navigtion-bar사용을 위해서 implementation을 추가해줍니다.
//chip navigation bar
    implementation 'com.github.ismaeldivita:chip-navigation-bar:(버전)'
    implementation 'org.jetbrains.kotlin:kotlin-stdlib:(버전)'
2. 메뉴 xml생성
res -> new -> Android Resource File

File name => bottom_menu
Resource type => Menu로 변경 ->ok
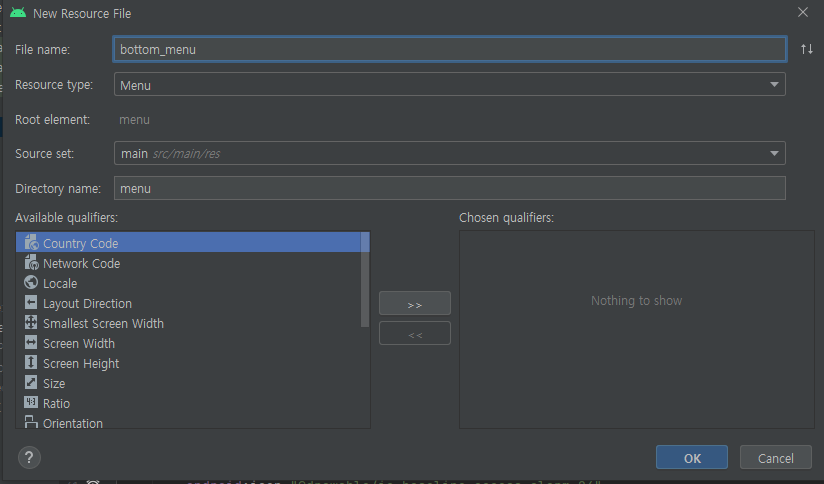
bottom_menu.xml작성
5가지 메뉴로 구성해주었습니다.
<?xml version="1.0" encoding="utf-8"?>
<menu xmlns:android="http://schemas.android.com/apk/res/android"
    app:cnb_unselectedColor = "#FFFFFF"
    xmlns:app="http://schemas.android.com/apk/res-auto">


    <item
        android:id="@+id/home"
        android:icon="@drawable/ic_baseline_home_1"
        android:title="Home"
        app:cnb_backgroundColor="#ff758b"
        app:cnb_iconColor="#fff"
        app:cnb_textColor="#fff"/>

    <item
        android:id="@+id/discover"
        android:icon="@drawable/ic_baseline_search_24"
        android:title="Discover"
        app:cnb_backgroundColor="#ff758b"
        app:cnb_iconColor="#fff"
        app:cnb_textColor="#fff"/>

    <item
        android:id="@+id/account"
        android:icon="@drawable/ic_baseline_account_circle_1"
        android:title="Account"
        app:cnb_backgroundColor="#ff758b"
        app:cnb_iconColor="#fff"
        app:cnb_textColor="#fff"/>

    <item
        android:id="@+id/start"
        android:icon="@drawable/ic_baseline_directions_run_24"
        android:title="Run"
        app:cnb_backgroundColor="#ff758b"
        app:cnb_iconColor="#fff"
        app:cnb_textColor="#fff"/>

    <item
        android:id="@+id/record"
        android:icon="@drawable/ic_baseline_access_alarm_24"
        android:title="Record"
        app:cnb_backgroundColor="#ff758b"
        app:cnb_iconColor="#fff"
        app:cnb_textColor="#fff"/>
</menu>
3. layout 구성
사용할 화면을 디자인합니다.
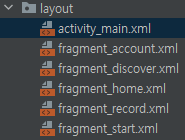
저는 총 5개의 화면을 사용할 것이기 때문에 5개의 xml을 만들었습니다.
3-1 activity_main
전체를 RelativeLayout으로 바꾼 후 아래와 같이 코드를 적었습니다. activity main은 바텀 네비게이션을 위한 xml입니다.
   <FrameLayout
        android:id="@+id/fragment_container"
        android:layout_width="match_parent"
        android:layout_height="match_parent"
        />

    <com.ismaeldivita.chipnavigation.ChipNavigationBar
        android:id="@+id/bottom_nav"
        android:layout_width="match_parent"
        android:layout_height="72dp"
        android:layout_alignParentBottom="true"
        android:background="@drawable/rounded"
        android:elevation="16dp"
        android:padding="8dp"
        app:cnb_menuResource="@menu/menu_bottom"
        />
3-2 fragment
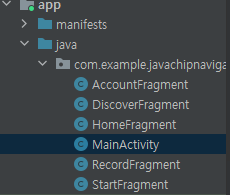
본격적으로 자신이 사용할 화면을 구성해줍니다.
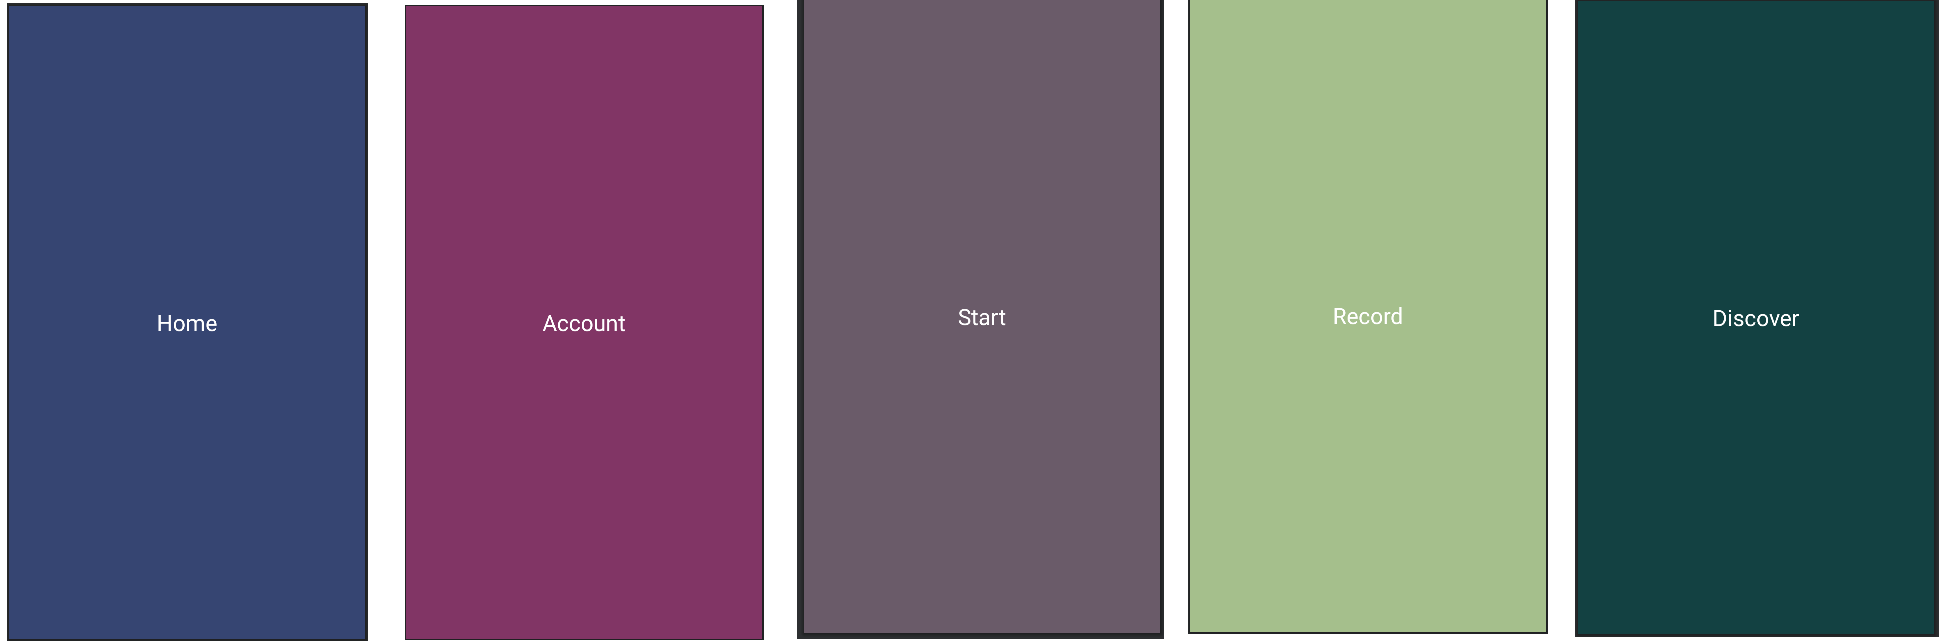
저는 home, account, start, record, discover 5가지 화면을 사용하기위해 5개의 fragment를 만들었습니다.
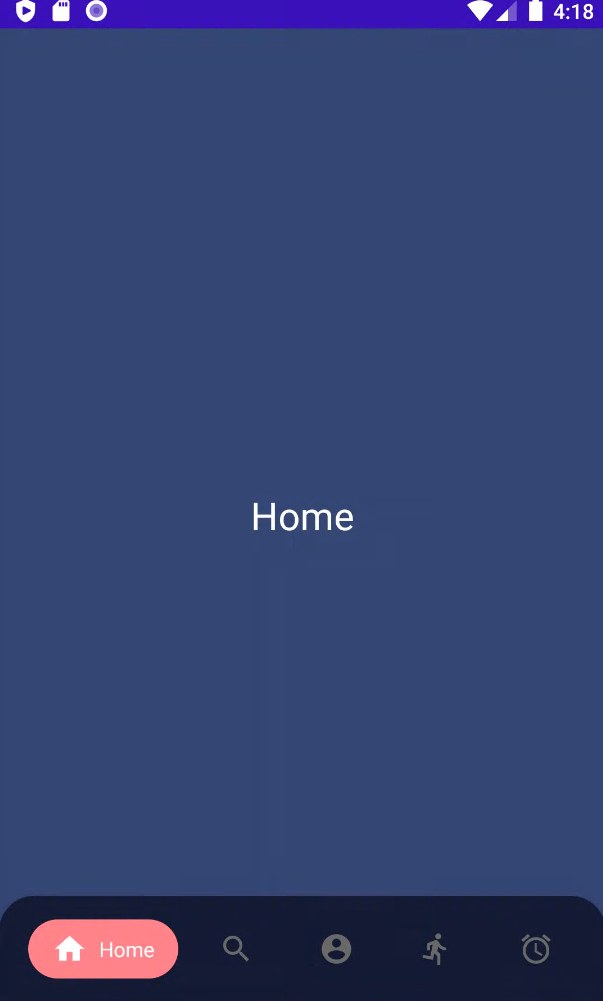
아래 코드는 home화면을 위한 코드입니다.
<?xml version="1.0" encoding="utf-8"?>
<RelativeLayout xmlns:android="http://schemas.android.com/apk/res/android"
    xmlns:tools="http://schemas.android.com/tools"
    android:layout_width="match_parent"
    android:layout_height="match_parent"
    android:background="#ff364572"
    tools:context=".HomeFragment">

    <!-- TODO: Update blank fragment layout -->
    <TextView
        android:layout_width="wrap_content"
        android:layout_height="wrap_content"
        android:text="Home"
        android:textSize="26sp"
        android:textColor="#ffffff"
        android:layout_centerInParent="true"/>

</RelativeLayout>
4. 자바코드 작성
화면 디자인이 끝나면 자바 코드를 작성합니다.
반드시 각 layout과 연결되어있는 Fragment가 있어야합니다.
public class MainActivity extends AppCompatActivity {
    private static final String TAG = MainActivity.class.getSimpleName();
    ChipNavigationBar bottomNav;
    FragmentManager fragmentManager;

    @Override
    protected void onCreate(Bundle savedInstanceState) {
        super.onCreate(savedInstanceState);
        setContentView(R.layout.activity_main);

        bottomNav = findViewById(R.id.bottom_nav);

        if (savedInstanceState == null){
            bottomNav.setItemSelected(R.id.home,true);
            fragmentManager = getSupportFragmentManager();
            HomeFragment homeFragment = new HomeFragment();
            fragmentManager.beginTransaction()
                    .replace(R.id.fragment_container, homeFragment)
                    .commit();
        }


        bottomNav.setOnItemSelectedListener(new ChipNavigationBar.OnItemSelectedListener() {
            @Override
            public void onItemSelected(int id) {
                Fragment fragment = null;
                switch (id){
                    case R.id.home:
                        fragment = new HomeFragment();
                    break;

                    case  R.id.discover:
                        fragment = new DiscoverFragment();
                        break;

                    case R.id.account:
                        fragment = new AccountFragment();
                        break;

                    case R.id.start:
                        fragment = new StartFragment();
                        break;

                    case R.id.record:
                        fragment = new RecordFragment();
                        break;
                }

                if (fragment!=null) {
                    fragmentManager = getSupportFragmentManager();
                    fragmentManager.beginTransaction()
                            .replace(R.id.fragment_container, fragment)
                            .commit();
                }else{
                    Log.e(TAG,"Error in creating fragment");
                }
            }
        });
    }
}
5. 결과물
https://tv.kakao.com/v/425537858
'프로그래밍 > 안드로이드' 카테고리의 다른 글
| <안드로이드스튜디오> 앱에 YouTube 연동하는 방법 (0) | 2022.02.27 |
|---|---|
| <안드로이드스튜디오> activity를 이용한 BottomNavigation (간단한 디자인) (0) | 2021.07.26 |
| <안드로이드스튜디오> actvity를 이용한 BottomNavigation (0) | 2021.07.26 |
| <안드로이드스튜디오> 안드로이드 - 캘린더 뷰를 이용해 날짜 확인 (0) | 2021.07.21 |


